

Maintaining focus and sharp memory can be challenging as our lives become increasingly hectic. Thankfully, yoga offers a holistic approach to boosting our cognitive abilities. Regular practice of specific yoga asanas promotes physical health and improves memory and concentration. In this journal-style blog, we’ll explore five yoga asanas to help you achieve a sharper mind. Keep exploring about wellhealthorganic.com:yogasanas-to-improve-memory.
Paschimottanasana (Seated Forward Bend): wellhealthorganic.com:yogasanas-to-improve-memory
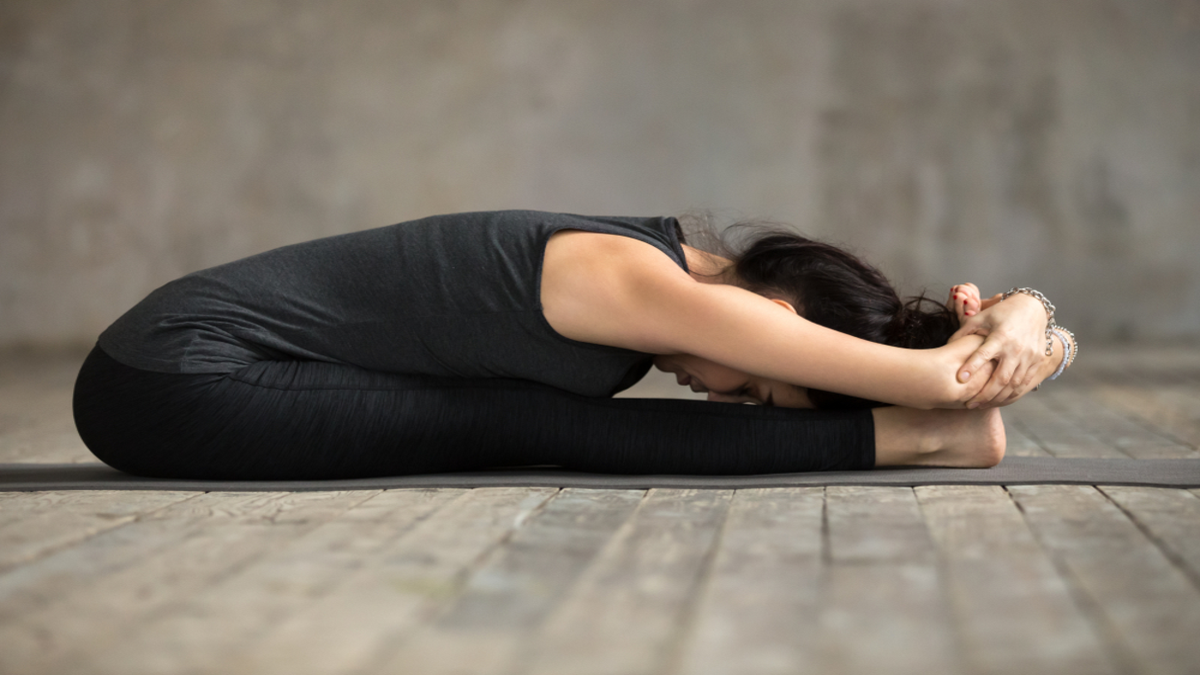
Paschimottanasana, also known as the Seated Forward Bend, is a classic yoga asana that offers many physical and mental benefits. In this comprehensive guide, we will examine the proper methods and processes for practicing Paschimottanasana, as well as the numerous advantages associated with this powerful pose. People do yoga for memory power in many cases.
Methods and Process
To practice Paschimottanasana correctly, follow these step-by-step instructions:
- Start by sitting on your yoga mat with your legs extended straight in front of you. Ensure that your spine is erect, and your feet are flexed, pointing towards the ceiling.
- Inhale deeply and raise your arms overhead, lengthening your spine.
- As you exhale, hinge forward from your hips, keeping your back straight, and reach for your toes, ankles, or shins, depending on your flexibility.
- Allow your head to relax towards your knees, but avoid forcing your chin down. Maintain a relaxed and natural curve in your neck.
- Hold the pose for 5-10 breaths, focusing on deep, slow inhalations and exhalations.
- To release, inhale and lift your torso, extending your arms overhead, then exhale and lower your arms back to your sides.
Modifications and Props
If you have tight hamstrings or lower back discomfort, consider using the following modifications and props:
- Place a folded blanket or bolster under your sitting bones to elevate your hips, making it easier to fold forward.
- Use a yoga strap around the soles of your feet, holding it with both hands to help you maintain a straight back while bending forward.
- If you cannot reach your feet, grasp your ankles or shins instead.
Benefits of Paschimottanasana
Practicing Paschimottanasana regularly can provide a multitude of benefits, including:
- Improved flexibility: This asana stretches the hamstrings, calves, and lower back, promoting overall flexibility and mobility.
- Enhanced digestion: The forward bend exerts gentle pressure on the abdominal organs, stimulating digestion and aiding in the elimination of waste.
- Reduced stress and anxiety: Paschimottanasana encourages relaxation and helps calm the nervous system, making it an effective pose for stress relief.
- Relief from back pain: The gentle stretch provided by this asana can alleviate tension in the lower back and improve spinal flexibility, leading to reduced back pain.
- Better concentration and focus: By increasing blood flow to the brain, Paschimottanasana can enhance cognitive function, memory, and focus.
Precautions and Contraindications
While Paschimottanasana is generally safe for most practitioners, there are certain precautions and contraindications to consider:
- Avoid practicing this pose if you have a recent or chronic back injury, or if you are experiencing severe lower back pain.
- If you have a hamstring injury, proceed with caution and avoid deep forward bends until fully healed.
- Pregnant practitioners should consult with their healthcare provider before attempting this pose, as deep forward bends may not be suitable during pregnancy.
Sarvangasana (Shoulder Stand)
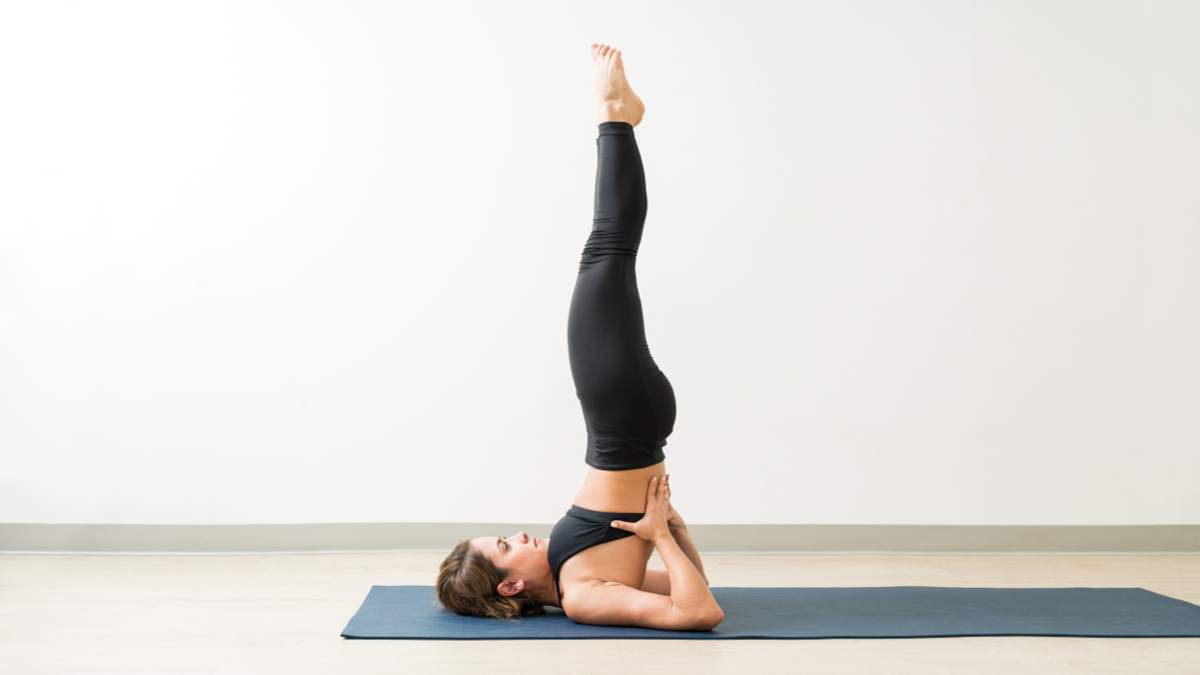
Sarvangasana, commonly known as the Shoulder Stand, is a popular and powerful yoga pose with numerous benefits for the body and mind. It is derived from the Sanskrit words ‘sarva’ (all), ‘anga’ (limb), and ‘asana’ (posture). As the name suggests, it involves the entire body and is an inverted posture where the body is balanced on the shoulders. In this article, we will explore the methods, process, benefits, and other important details of this asana. You can do yoga for memory and concentration.
Methods and Process
Before practicing Sarvangasana, ensure that you have a firm, non-slippery surface, like a yoga mat. It is advised to practice this asana on an empty stomach or at least 3-4 hours after a meal. Follow the steps below to perform the Shoulder Stand:
- Lie down on your back with your legs together and arms by your sides, palms facing down.
- Take a deep breath and, while exhaling, lift your legs off the ground to a 90-degree angle.
- Inhale and, using your abdominal muscles, lift your hips off the ground, bringing your legs over your head.
- Place your hands on your lower back, with your elbows on the ground, to support your body.
- Slowly raise your legs upwards, keeping them straight and together, until your body is aligned and perpendicular to the ground.
- Ensure that your chin is tucked into your chest, and your weight is balanced on your shoulders and upper arms.
- Hold the posture for 30 seconds to 3 minutes, while maintaining a steady and relaxed breath.
- To release the pose, lower your legs over your head, remove your hands from your back, and gently lower your spine and legs back to the ground.
Note: Beginners can use a folded blanket or towel under the shoulders for extra support.
Benefits of Sarvangasana
Practicing Sarvangasana offers numerous benefits for the body and mind, including:
- Improved circulation: Being an inversion, it aids in blood flow to the brain and upper body, promoting better oxygenation and nutrient delivery to cells.
- Stimulates the thyroid gland: The position of the chin and neck during Sarvangasana stimulates the thyroid gland, which can help regulate metabolism and hormonal balance.
- Strengthens the spine and core: The pose engages the abdominal and back muscles, improving spinal strength and flexibility.
- Relieves stress and calms the mind: The asana has a soothing effect on the nervous system, helping to reduce stress, anxiety, and mild depression.
- Enhances digestion: The inverted position aids in digestion by applying gentle pressure on the abdominal organs.
- Reduces varicose veins: The posture helps alleviate the symptoms of varicose veins by improving blood flow to the lower extremities.
Precautions and Contraindications
While Sarvangasana is highly beneficial, it is essential to consider the following precautions:
- Avoid practicing this asana if you have high blood pressure, heart problems, glaucoma, or any neck and shoulder injuries.
- Pregnant women and individuals with a history of stroke or spinal issues should consult a doctor before attempting this pose.
- Always practice under the guidance of a qualified yoga instructor, especially if you are a beginner or have any health concerns.
Padmasana (Lotus Pose)
Padmasana, commonly known as Lotus Pose, is an ancient seated yoga posture that derives its name from the Sanskrit words “Padma” (meaning lotus) and “Asana” (meaning pose or posture). This asana is known for its ability to promote mental and physical well-being. In this guide, we will explore the step-by-step process of performing Padmasana, its numerous benefits, and other essential considerations.
Methods & Process
Before attempting Padmasana, it is essential to warm up your body and stretch your hips, knees, and ankles to avoid injury. Here is a step-by-step guide to help you perform Lotus Pose:
- Start by sitting on a yoga mat with your legs extended in front of you, spine straight, and hands resting on your knees.
- Bend your right knee, and gently place your right foot on your left thigh, close to your hip. Ensure that the sole of your foot is facing upwards.
- Similarly, bend your left knee and place your left foot on your right thigh, close to your hip. Make sure the sole of your left foot is also facing upwards.
- Keep your spine erect and maintain the natural curve of your lower back.
- Place your hands on your knees in Gyan Mudra or Chin Mudra (thumb and index finger touching, while the other fingers are extended).
- Close your eyes and focus on your breath. Inhale and exhale slowly and deeply.
- Hold this pose for a few minutes or as long as you feel comfortable. Gradually increase the duration over time.
- To release the pose, gently remove your left foot from your right thigh, followed by your right foot from your left thigh. Extend your legs in front of you and give them a gentle shake.
Benefits
Padmasana offers a wide range of physical, mental, and spiritual benefits:
- Improves digestion: The Lotus Pose aids in the stimulation of the digestive system, promoting healthy digestion and elimination of waste.
- Enhances flexibility: Regular practice of Padmasana stretches and strengthens the muscles, ligaments, and joints in the hips, knees, and ankles, improving overall flexibility.
- Promotes mental clarity: As a meditative posture, Padmasana helps calm the mind and enhance focus, promoting mental clarity and reducing stress.
- Stimulates the chakras: The Lotus Pose is believed to stimulate the root (Muladhara) and sacral (Svadhisthana) chakras, encouraging a balanced flow of energy within the body.
- Supports spinal health: Maintaining an erect spine during Padmasana helps improve posture and alleviate lower back pain.
- Encourages discipline and perseverance: Mastering Lotus Pose requires patience, dedication, and self-discipline, qualities that can benefit other aspects of life as well.
Additional Considerations
- Avoid practicing Padmasana if you have a knee, hip, or ankle injury, or if you experience pain while performing the pose.
- Pregnant individuals should consult with a healthcare professional or a qualified yoga instructor before attempting Padmasana.
- Always practice under the guidance of a certified yoga teacher, especially if you are a beginner.
- If you find it challenging to perform the full Lotus Pose, try modifications such as Ardha Padmasana (Half Lotus Pose) or Sukhasana (Easy Pose).
- Consistency and patience are crucial in achieving the flexibility and strength required for Padmasana. Practice regularly, and do not rush the process.
Vrikshasana (Tree Pose)
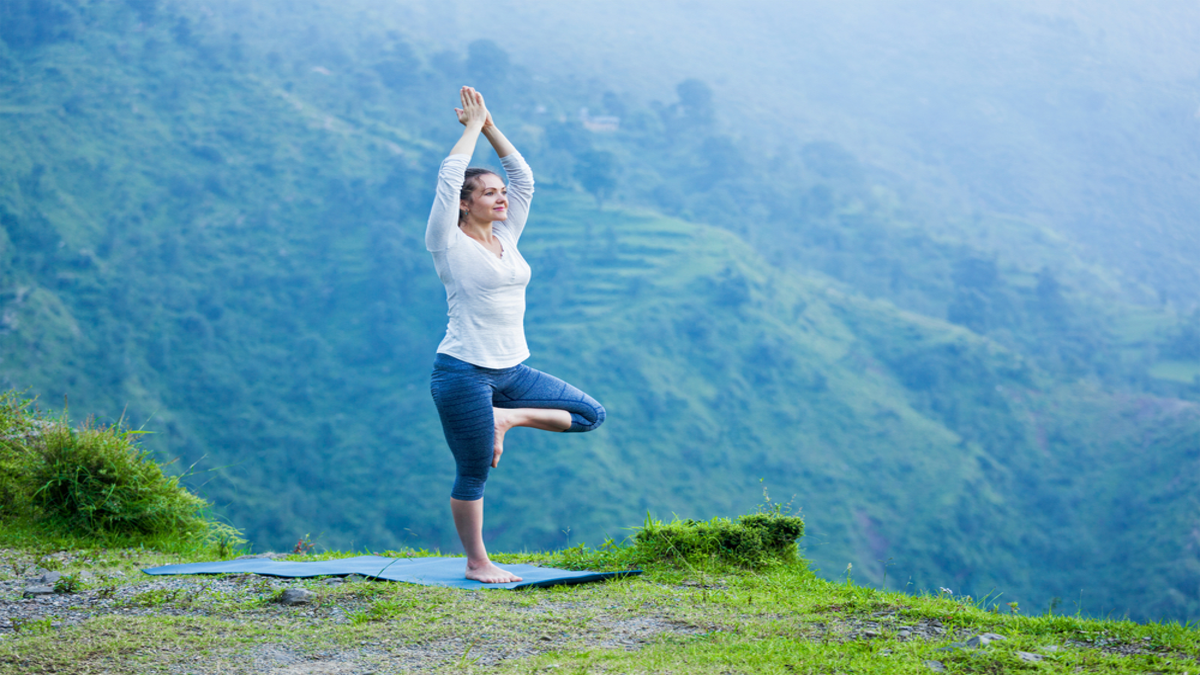
Vrikshasana, commonly known as Tree Pose, is a fundamental standing yoga asana that encourages balance, focus, and inner tranquility. This pose is named after the steady and grounded nature of a tree. Practicing Vrikshasana offers various physical and mental benefits, making it an essential part of many yoga routines. In this article, we will delve into the methods and process of Vrikshasana, its benefits, and other essential details. Many individuals prefer to perform yoga for concentration.
Methods and Process
To practice Vrikshasana, follow these step-by-step instructions:
- Begin by standing tall in Tadasana (Mountain Pose) with your feet together and your arms resting by your sides. Distribute your weight evenly on both feet and engage your core muscles.
- Slowly shift your weight onto your left foot, and bend your right knee, lifting the right foot off the ground.
- Place the sole of your right foot on the inner left thigh, as high as possible, with the toes pointing downward. If this is challenging, place the foot on the left calf or ankle. Avoid placing the foot directly on the knee.
- Keep your pelvis neutral and maintain a straight spine, ensuring your hips are aligned.
- Bring your palms together at your chest in Anjali Mudra (prayer position) or raise your arms overhead, keeping them shoulder-width apart with palms facing each other.
- Gaze at a fixed point in front of you to maintain balance and concentrate on your breath.
- Hold the pose for 30 seconds to 1 minute, or as long as you comfortably can.
- To release, gently lower your right foot back to the ground and return to Tadasana.
- Repeat on the opposite side, with the left foot on the right thigh.
Benefits
Practicing Vrikshasana offers numerous physical and mental benefits, such as:
- Improved balance and stability: By engaging the muscles in your legs and core, Tree Pose helps enhance balance and stability.
- Strengthened lower body: This pose strengthens the ankles, calves, thighs, and hips, reducing the risk of injury and promoting overall lower body strength.
- Better posture: By maintaining a straight spine and engaging the core, Tree Pose promotes proper posture and spinal alignment.
- Increased focus and concentration: The balancing aspect of this pose requires mental focus and concentration, which can be beneficial in everyday life.
- Stress reduction: As with many yoga poses, Vrikshasana encourages a sense of inner calm and tranquility, reducing stress and anxiety.
- Enhanced flexibility: Tree Pose gently stretches the inner thighs, groin, and shoulders, promoting flexibility in these areas.
Precautions and Modifications
When practicing Vrikshasana, keep the following precautions and modifications in mind:
- If you have balance difficulties, practice the pose near a wall for support.
- Avoid practicing Tree Pose if you have severe knee, ankle, or hip injuries.
- Pregnant individuals can practice the pose with the foot placed on the calf or ankle, and should use a wall for support if needed.
- If you experience discomfort raising your arms overhead, keep your hands in Anjali Mudra at your chest.
Incorporating Vrikshasana into your regular yoga practice can help you experience its myriad benefits, including improved balance, focus, and flexibility. Remember to listen to your body and make modifications as necessary to ensure a safe and enjoyable practice.
Bhramari Pranayama (Bee Breath)
Bhramari Pranayama, also known as Bee Breath, is a yogic breathing technique that derives its name from the Sanskrit word “Bhramar,” which means “a large black bee.” This pranayama is so called because it mimics the humming sound made by a bee while practicing. Bhramari Pranayama is known for its calming effects on the mind and body, making it an effective stress-relieving technique. This article will discuss the methods, process, benefits, and other essential aspects of Bhramari Pranayama.
Methods and Process
To practice Bhramari Pranayama, follow these steps:
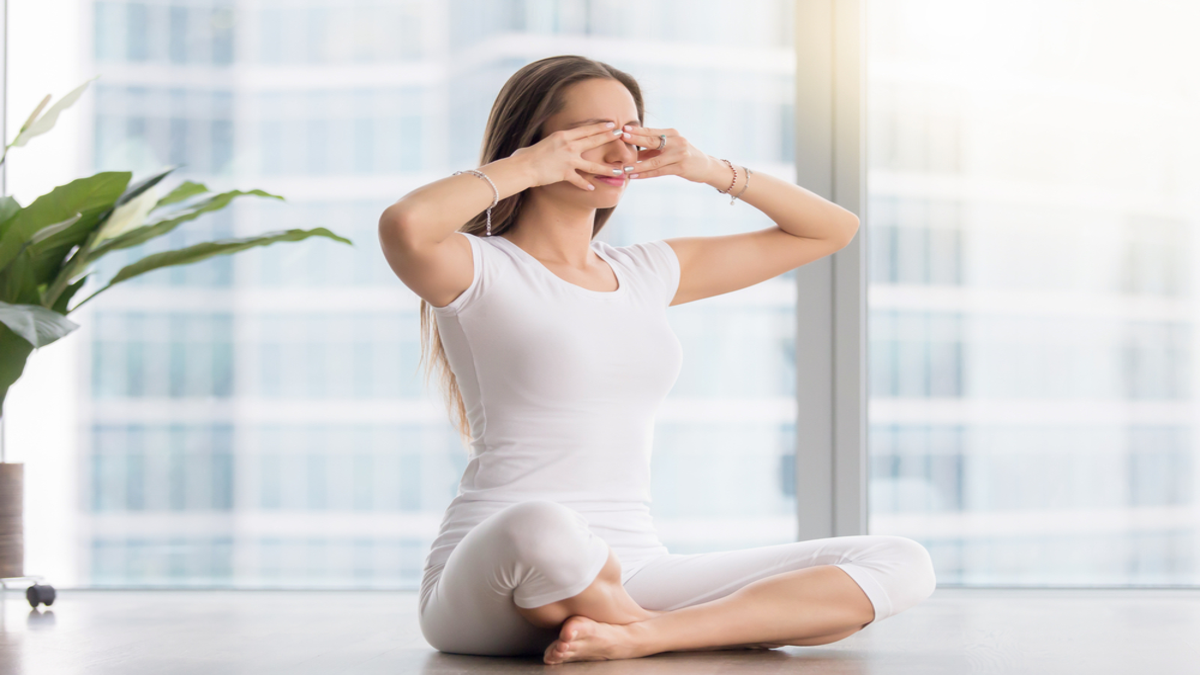
- Find a quiet and comfortable place to sit with your spine straight and shoulders relaxed.
- Close your eyes gently to minimize external distractions.
- Place your index fingers on the cartilage between your ears and cheeks, and close your ears by gently pressing on the cartilage.
- Take a deep breath in through your nostrils, filling your lungs completely.
- As you exhale, make a humming sound like a bee, keeping your mouth closed. The sound should be deep, slow, and steady, resonating in your head and throat.
- Focus on the vibration created by the humming sound and feel it spread throughout your body.
- Continue this process for 5-10 minutes or as long as you feel comfortable.
- To finish, take a deep breath in, and then exhale slowly and completely. Gently release your fingers from your ears and sit quietly for a few moments to absorb the effects of the practice.
Benefits
Practicing Bhramari Pranayama regularly offers numerous benefits for both physical and mental well-being:
- Stress reduction: The humming sound and vibrations created during the practice help calm the mind, reduce stress, and promote a sense of relaxation.
- Improved concentration: Bhramari Pranayama enhances focus and clarity of thought, making it beneficial for students and professionals alike.
- Alleviates anxiety and depression: The practice helps to balance the nervous system, which can alleviate symptoms of anxiety and depression.
- Sleep improvement: By calming the mind and inducing relaxation, Bhramari Pranayama can help improve sleep quality and combat insomnia.
- Blood pressure regulation: The practice can help to lower high blood pressure by promoting relaxation and reducing stress.
- Sinus relief: Bhramari Pranayama can help to clear blocked nasal passages and relieve sinus congestion.
- Enhanced lung capacity: The deep, controlled breathing involved in this pranayama helps to improve lung function and capacity.
Precautions and Other Considerations
While Bhramari Pranayama is generally safe and beneficial for most individuals, there are a few precautions to keep in mind:
- Pregnant women should consult a healthcare professional before practicing this pranayama, especially during the later stages of pregnancy.
- Individuals with a history of heart conditions, epilepsy, or severe ear infections should practice Bhramari Pranayama under the guidance of a qualified yoga instructor.
- Avoid practicing Bhramari Pranayama immediately after a meal. Wait for at least 2-3 hours after eating to ensure proper digestion.
- If you feel dizzy or uncomfortable during the practice, stop immediately and return to normal breathing.
So there are various benefits of yogasan that you now know. Keep reading to get detailed insights into wellhealthorganic.com:yogasanas-to-improve-memory.
Also Read: Yoga Centres – The New Go-To for Fitness